Sun Shade Sail Installation Ideas: 9 DIY Tips to Make Your Shade Sail Soar!
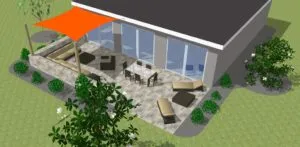
Shade sails can be the final little touch that makes a backyard patio into a truly amazing space, the roof to your ideal outdoor room. Patio shade sails provide shelter from the sun and bring an unparalleled vertical presence and beauty to your backyard decor. The practicality of installing patio sail(s) in various configurations is an important aspect to consider, as each backyard has a different working environment for the sails to work their magic. This patio sun shade sail installation ideas guide will help get you oriented and ready to install your shade sail! For the most part, installation of a shade sail is relatively straightforward, but of course, each individual unit is installed differently, so we encourage you to read the specific instructions of your unit. Be sure to follow the engineering recommendations of your specific sail, as they vary. All information in this guide is general, and may not apply in some circumstances. The installation of shade sail installation DIY guide is broken down into a list of nine tasks. Each task is outlined below.
Sun Shade Sail Installation Ideas
In this article, we’ll discuss several ways homeowners can install shade sails in their yards. We’ll discuss shade sail shape and various options for attachment points. Many of these options are DIY-friendly, but in some circumstances, it can be wise to look for professional help. Now let’s get started with our ideas and tips! We’ll begin with the most exciting one….
1. Check with your Local Building Official and Homeowners Association
Before you start your installation, be sure to check with your local building department to ensure that no permits are required for your specific install, and check with local utilities to be sure no underground wires or other unexpected surprises are present in the areas in which you may need to dig. If you live in a community with a Homeowner’s Association, you’ll want to check with them to make sure that there are no specific rules and guidelines that need to be followed in order to set up patio shade sails.
2. Get the General Layout
Take a good look at the area where you wish to set up your patio sail. Get the general layout of the area you want to shade, and the size and shape of the shade sail(s) you plan to use. Here are a few sun shade sail installation ideas for layout and design.
Determine the Shade Sail Position

Do you want the shade sails to be positioned horizontally, or at an angle?
Horizontal Position
If the shade sails are flown horizontally, they won’t pick up as much wind and therefore will exert less structural pressure on their mounting points. Horizontal sails are easier to deal with but offer less visual interest than angled sails. And horizontal shade sails will provide the greatest amount of shaded area.
Angled Upward
If the sails are flown at an angle pointing upward, they will pick up much more wind. With this additional load, the quality of the mounting points becomes much more of a concern.
Multiple Layered Shade Sails
One great shade sail installation idea is to use multiple sails positioned horizontally at different heights to create a dynamic height environment. This gives vertical interest, but by keeping all of the sails horizontal and using multiple anchor points, this results in less stress on the structure.
Determine the Solar Orientation of the Space
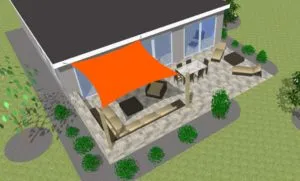
What is the solar orientation of the area the shade sail(s) will cover, and will the shade sail(s) be positioned correctly to shade the area during the appropriate time of day? If you’re primarily using the yard at noon when the sun is directly overhead, then this is easy: the sail goes directly above the sitting area. If you’re using it late in the afternoon or in the morning, consider the effect the sun’s position will have on the area you wish to shade. Depending on your location, the time of year, and the height of the patio shade sail, the area you want shaded may not be where you plan to put your patio sail! So be sure you’ve got the patio shade sail in the right location. One great strategy is to pull up your address on Google Earth and take a look at its solar positioning. Using Google Earth, you can virtually see how shadow and light impacts your property, and you can get a satellite’s eye view of where everything goes at different times of day, and different times of the year.
Determine the Wind Power of the Area
How strong is the wind in the area, and how will the wind blow through your property? If the patio is between two buildings, is it a wind tunnel? If so, a horizontal installation may be more effective.
3. Check Out the Existing Mounting Options
Examine your backyard and consider the various existing options for securing the points on the shade sail. Considerations:
How to Install a Shade Sail on a Deck or Existing Building Walls
Do you have an existing back deck or a wall of the house that can be attached to? If so, great! You’re on your way. Mounting a couple of points of a shade sail on an existing structure makes things much easier. You can attach one or two mount-points to a deck or wall, though you should be sure you’re mounting to something structural. When you’re planning how to install a shade sail on a deck, you want to be sure that you attach your sun shade sail to a deck joist or other structural member – not just a piece of fascia or trim board. A strong wind can rip the sail off, and perhaps the fascia board, too! See below for more information on structural members behind the fascia.
Shade Sail Post Ideas: Pergolas, Fences, and Other Existing Fixed Elements
Perhaps you have a pergola, fence post, a well-placed tree, or another existing element that can be used to get things started. In most cases, a backyard/patio is in some way adjacent to the house or deck, and hopefully, the house or deck will be able to supply mounting points for at least two vertices.
Questions and Concerns about Posts and other Obstacles
Here are a few concerns and questions to ponder when locating your shade sail.
- When considering shade sail post ideas, you need to think about how strong the existing posts are. If they are solidly built, such as part of a house wall or a permanent pergola or other architectural structure, you are likely in good shape. If they are old, rotting, or a temporary or decorative solution, they probably do not offer the holding power needed to handle shade sails.
- Do you have a grill or fire pit under the area you wish to shade? If so, these will need to be moved, as having an open flame below a shade sail is a clear fire hazard! Should the patio sail be way up in the air, this is less of a concern, but if it is placed within 10’ of where the grill would be, it would be wise to move the grill.
4. Determine if Additional Mounts are Needed
The far side of the shaded area becomes a bit more complex, in most cases. Considerations:
- If you already have a pergola, building wall, or other architectural feature present at the other end of the “outside room” you intend to create, you may be able to achieve all the points necessary to secure a triangle or square shade sail without adding additional posts or structural elements.
- Adding posts* to suspend the patio sail from is the likely next path, and where much of the work will be. If you have to add posts, do you know what your soil conditions are? Have you checked with your local utilities to ensure no underground wires, gas pipes, or hidden oil fields?
* Note, be sure that any post you are planning on using has a proper footing and is at least 4’ in the ground in order to ensure the strength of the structural post and protection from frost heaves (depending on your location). For more details on installing posts, see below.
5. Finalize the Mount Point Locations Based on Shade Sail Size
Locate the mounting points based on the size of the shade sail(s). Consideration:
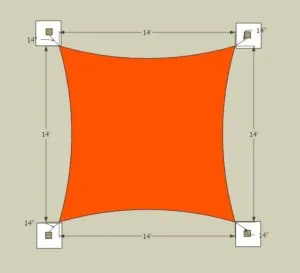
Sail Corner Location vs. Mount Point Location
At of each corner of the sail, you should figure for a distance between the corner of the shade sail and mounting point that of about 10% of the total length of the shade sail. For example, if you’re using a square shade sail that is 14’ long (168 inches), allow at least 14-16 inches of space between the corner of the shade sail and the mounting point. This gives a buffer at each corner for material expansion, tension adjustment, and space for mounting hardware.
6. Choose your Mounting Hardware
There are a variety of mounting brackets and systems available for attaching and properly tensioning shade sails. Here are a couple of options, one for triangular patio sails, and another for rectangular shade sails.

CosCool Sun Shade Sail Hardware Kit, 6-inch Rectangular, Stainless Steel, Waterproof…
Complete set: The hardware kit for RECTANGULAR / SQUARE shade sails comes as a complete set, which includes 2 Turnbuckles, 4 Pad eyes, 2 Carabineers/hooks, 16 Screws, 16 expansion anchor bolts, and an installation manual. This comprehensive kit contains the necessary hardware and instructions required for an effortless installation process.

COSCOOL Shade Sail Hardware Kit for Sun Shade Sails Stainless Steel Installation Hardware…
Complete set: The hardware kit for TRIANGULAR shade sails comes as a complete set, which includes 2 Turnbuckles, 3 Pad eyes, 1 Carabineer/hook, 12 Screws, 12 expansion anchor bolts, and an installation manual. This comprehensive kit contains the necessary hardware and instructions required for an effortless installation process.
7. Attach the Mounting Brackets to Existing Mounting Spots
Attaching To Fascia:
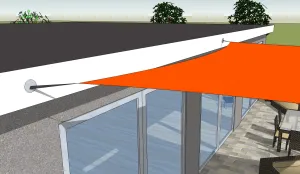
Mount Points on Fascia
If you plan on attaching your shade sail to a location on the house, you want to find a spot that has good structural integrity (similar to hanging a heavy picture on a stud wall, as opposed to just hanging on drywall or plaster). If you can find a location where there is an exterior wall stud to screw into, this is ideal. Alternately, if you are attaching the sail up at the roof line, you want to find a location on your fascia board where a rafter is connected to the fascia, so that you can screw into both the fascia board and the rafter. If you want to further strengthen the mounting point, consider installing Simpson Hurricane clips or other Simpson metal brackets.
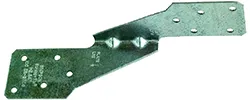
Simpson Hurricane Tie
Note: Be sure to check your shade sail installation guide for engineering details. This is for informational purposes only, and should not be relied upon in individual cases. Confirm with a structural engineer as necessary.
Add Posts Where Necessary
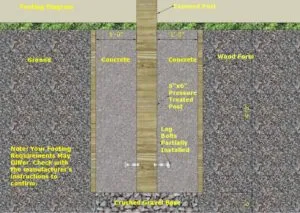
Should you need to add additional shade cloth posts as support for your shade sail, we would suggest 4”x6” or 6”x6” Pressure Treated posts, available at most lumber suppliers, Home Depot, etc. These can be in direct contact with the ground and with concrete. The overall length of the post needs to include footing depth: at least 4’ deep, ideally half of the length of the overall exposed post height. If you want 8’ of an exposed post, you will need to purchase a 12’ post and bury 4’ in the ground in concrete.
Note: this footing information is for conceptual use only, and should not be relied upon in individual cases. Be sure to check the information in your product manual for specific instructions to your requirements. Confirm with a structural engineer if necessary.
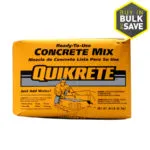
Follow the instructions on the concrete bags you have; if you get something like Quikrete, all you’ll need to do is add water to the correct ratio and mix it up with a shovel before pouring it into your form. Be sure to fill up to the top of the form, and tamp it down to ensure there are no voids. If you get a concrete such asQuikrete, it should harden in an hour or two, but be sure to leave the post braced in a level and plumb position until the concrete is solid. It will continue to harden for several days after pouring.
Finish Hooking up Shade Sail and Tension
Examine the mounting kit you’ve chosen, and fasten the required bolts to the sail shade pole or other structural elements. Be sure all points are secure and are ready to support the weight of the sail(s). Finally, attach each vertex of the shade sail to each of the mounting points. Your patio sail is up! Adjust the tension of the sail so that it is pulled as tightly as appropriate. There should be no visible wrinkles, and the shade should have a smooth, finished look and should not billow significantly in the wind. Be sure not to over-tension so as to pull out mounting brackets, or rip the fabric of the sail, or of the mounting grommets. We hope that you have got some inspiration from these sun shade sail installation ideas, and now have some sense as to how you might set up a shade sail on your property.
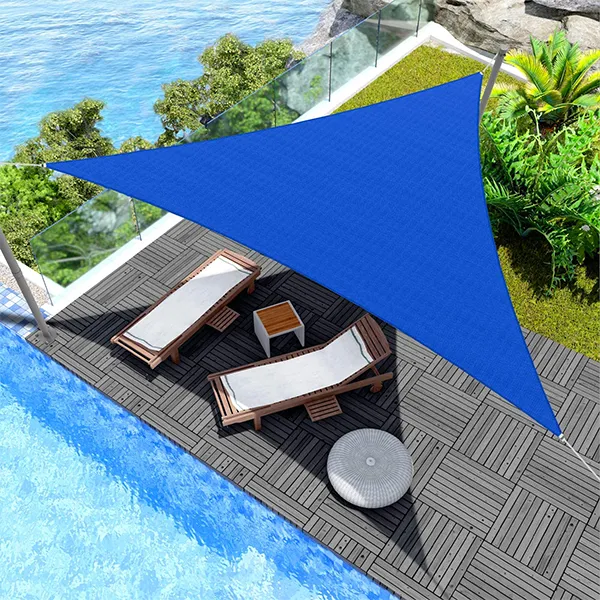
And it’s up! Looks amazing!
CosCool Sun Shade Sail Hardware Kit, 6-inch Rectangular, Stainless Steel, Waterproof…
Complete set: The hardware kit for RECTANGULAR / SQUARE shade sails comes as a complete set, which includes 2 Turnbuckles, 4 Pad eyes, 2 Carabineers/hooks, 16 Screws, 16 expansion anchor bolts, and an installation manual. This comprehensive kit contains the necessary hardware and instructions required for an effortless installation process.
COSCOOL Shade Sail Hardware Kit for Sun Shade Sails Stainless Steel Installation Hardware…
Complete set: The hardware kit for TRIANGULAR shade sails comes as a complete set, which includes 2 Turnbuckles, 3 Pad eyes, 1 Carabineer/hook, 12 Screws, 12 expansion anchor bolts, and an installation manual. This comprehensive kit contains the necessary hardware and instructions required for an effortless installation process.