Have you ever opened the door to your shed to look for something specific, only to turn right around and walk out right away? It’s such a mess in there, you’ll never find what you’re looking for! You need to learn how to organize your shed!
What you thought would be like having an extra room for storage of outdoor items has turned out to be a dumping room for all your outdoor tools, toys, plant pots, and the like. As so often happens, there is so much stuff stored in there, it’s better to keep the door shut and go inside until winter.
But, help is at hand!
It’s time to learn how easy it can be to organize your shed. You might even find something interesting as you trawl through all those items buried in the corner. So let’s make the shed into what it should be: a super useful outdoor storage area. A place you can rely on to find everything you need in an instant.
It cannot happen overnight, but it will be worth the effort you are about to put into it.
How to Organize Your Shed
The first question should be: Where to start?
The answer to that is dependent on how large your outdoor shed is.
Small Shed
If it’s a small shed or larger scale deck box, then pick a warm sunny day and pull everything out into the yard. Empty it all out until all that’s left is an empty shell.
Large Shed
If your shed is on the larger side, it’s best to tackle one section at a time. Pulling everything out that is against one wall at a time, so that you don’t get overwhelmed and stop in the middle of the process, or have to quit early and throw stuff back in without any organization.
As you pull out the boxes, tools, and equipment, you might as well give your overburdened shed a good clean and repair. That way you are dealing with any issues, all at the same time, and winterizing your outdoor storage area.
Clearing and Cleaning
For this part, you should have some cleaning and repair tools at hand:
- Trash Bags for junk. Depending on the size of your shed, you may need some Husky Contractor Bags.
- A small hand-held brush for sweeping off dust and debris that has collected on items that you want to put back in there.
- A long-handled broom for a good sweeping out. Sweep the walls carefully too, and rid the place of cobwebs, inside and out. Look in the corners for web-balls that have baby spiders inside. Use a brush to get rid of them because they can stick to your hands.
Materials List:
Last update on 2025-07-07 / Affiliate links / Images from Amazon Product Advertising API
Cleaning the Shed
- Open-up the doors, windows, vents, and skylights to air the room out, if these are available.
- Give the whole shed a thorough sweep inside and out.
- Completely clear away any dried mud and grass.
- Be careful of any chemicals, canisters, paint, oil cans, or old batteries you might find. Handle them with care, and put them away so children cannot reach them.
- Use a mild detergent and water to clean off bird droppings and plant sap from any wood, should you have a wooden shed.
Organize Your Stuff into Categories
As you take out the stored items, place them in piles of different categories, such as:
- DIY tools (e.g. hammers, screwdrivers)
- Electrical DIY tools (e.g. drill, sander)
- Small DIY accessories (e.g. screws, nails, wire)
- Long handled tools for the garden, (e.g. rake, hoe)
- Cans of paint and any decorating kits
- Trash for disposal
- Household items
- Kids toys, bikes, scooters, etc.
- Pool or hot tub accessories
It is worthwhile spending time on making up your own categories as needed, similar to the ones suggested here. This way, it will speed up the whole process when it comes to putting it all back again, and the organization will be better.
Multi-day Organization Projects
If the cleaning and repairs are going to take longer than a single day, you may want to get a couple of waterproof tarp sheets like these Hanjet tarps.
Lay out the first tarp on the ground, and leave the other one to place on top at the end. One for underneath and one to go over the shed contents overnight. Don’t forget to take any valuables indoors. Ensure any chemicals are well sealed and put out of reach of children or pets.
Repairs
Before you go put everything goes back inside, there is another job to be done. This is the ideal opportunity of doing some basic maintenance to the building.
If you are making the effort to re-organize your shed, then it is worthwhile showing it some TLC. Ensuring that the shed is water tight and secure will help it to last a few more years. Here are a few ideas of what to look for:
- If during your inspection, you see small cracks where water could penetrate, it’s a good idea to caulk with a silicone sealer like this DAP Caulking. Depending on the color and material of your shed, you may need a different type of caulk.
- Where the sun shines on the shed the most, it will be prone to bleaching and cracking the wood. Cracked wood is better sanded away. You might even consider re-treating the wood with an all-around waterproofing, or paint, or varnish.
- Dirt and dust tends to collect under the eaves, so give them a good sweep out.
- Wind can lift the material placed on the roof, and loosen panels, so inspect for all these possibilities.
- Check bolts and screws for signs of loosening
Obviously, depending on if you have a wooden shed, metal shed, resin shed, or composite shed, the materials requirements may be a bit different.
Shed Foundation Base
Check to ensure that your shed base or foundation is still level and solid. If it’s not, you might as well deal with it now, while it’s empty!. Leaving a sloped or weakened shed base will lead to problems down the road.
A shed placed on an uneven foundation will eventually start to warp, and the doors will have a hard time latching correctly. Additionally, warped walls can turn into a weak roof that could become dangerous.
Start by checking your foundation or shed base.
Signs of Damage
Depending on the materials you’re looking at, some damage will be obvious, but other bits are more difficult to find.
Windows

Check for any cracks in the glass or plastic of the windows. Should you have broken glass in your shed, the glazing is usually pretty easy to replace and you should be able to do this yourself, all for the cost of getting a local hardware store or glass company to get a sheet of glass cut to size.
Check that the frame is square and that there are no gaps to enable water intrusion. If it has any gaps, then use some putty or Butyl Tape to fill them in. If your windows are made of plastic, you may be able to purchase new plastic glazing from your local glass company or hardware store. If necessary, you could always replace the windows with real glass.
Last update on 2025-07-07 / Affiliate links / Images from Amazon Product Advertising API
Wood
Go around and inspect all the wooden walls, doors and floor. You are looking for any cracks or holes in the wood. Don’t ignore them as they will let water in during the winter months, causing anything stored in there to get damp.
Instead, fill them with a good quality wood filler like Bondo. Hit any gaps that should not be there. Put the filler on the outside of the crack or hole, and duct tape on the inside. Should the crack get any bigger, your sealant will also come away. It’s a sign that you need to replace the outer wooden slats instead.
Check if you have any rotting of soft wood. You can replace outer panels or slats if needed. Should it be the supporting timbers that are damaged, you can repair them by sistering new ones next to the problem joists. Not if they are rotting, though. Then, they will need replacing altogether, as they are supporting the roof.
It is better to prevent rot than allow it to happen in the first place. Make sure your shed gets at the very least, a bi-annual new coat of waterproof staining.
Last update on 2025-07-07 / Affiliate links / Images from Amazon Product Advertising API
Metal
If your shed is metal like these Arrow Sheds, then it should last a good 15 years before age repairs are needed. The most common issue with metal sheds is rust. When rust sets in, you can use rust inhibitors like Rustoleum to keep things going.
Ideally, you’d be watching for signs of exposed metal, and when you find these spots, spray them with Rustoleum paint. But often these issues come up in non-visible corners of the shed, or hard to get to spots that are easy to ignore.
If you’ve got a big rusty patch, you could try Rustoleum Rust Reformer, which may cover everything over and allow you to paint on top, but it depends on how bad the circumstances are.
For the larger holes, try using a car repair kit, or you could glue a metal plate over the hole and seal it with metal glue.
Last update on 2025-07-07 / Affiliate links / Images from Amazon Product Advertising API
If your shed is too far gone to be salvageable and you’re in the market for a new shed, see our article on different shed materials to determine what the best shed material is for your needs.
Once the repairs to the shed are complete, it is time to put your belongings back in there. Hopefully, you will have less to go back in than what came out, as you will have disposed of unused or broken items.
Shed Organization
To make it easier to find things in your shed, you might as well use this opportunity to do an organized reshuffle of your belongings. After all, you bought your shed to store things in, so it’s better if you can find them quickly!
That is your next chore: organization.
Now is the perfect time to add some new storage features. They will improve the clutter you have just cleared out of your shed.
Here are some great ideas that are neither expensive or difficult to implement.
Walls
Don’t go driving nails into the walls at random, you risk causing damage and weakening the wood. This is especially true with resin and metal sheds, where the structural members are only located in specific spots.
Instead, install larger pieces of wood that will take the many hooks and nails you were going to hammer into the wall.
Look at some alternatives for storage on the walls, such as:
Pegboard
Hang a large pegboard panel, such as this Wall Control Pegboard onto the studs of the shed wall. These boards come in various sizes and materials, so find the right one for your needs. This is an excellent way to store all your hand-held tools and keep them accessible, rather than in boxes.
Put your pegboard hooks where you want them on the board. Now you can hang hand tools such as spanners and screwdrivers.
The next time you’re searching around for a certain size screwdriver, all you need to do is look at the board, and there it will be. No need to rummage through rusty toolboxes, catching your hands on anything sharp.
Wire baskets with pegboard hooks are also a great option for shed storage.
Last update on 2025-07-07 / Affiliate links / Images from Amazon Product Advertising API
Magnet Strips
Similar idea to the pegboard, only this time you are attaching a magnetized strip, such as these GoPlus Magnet Strips to the wall. The best type will be the knife-style strips.
Attach any hand tools that will stick to the magnetic strip for quick access.
An 18″ strip will hold around 22lb in weight, which could be around 6-7 tools.
Last update on 2025-07-07 / Affiliate links / Images from Amazon Product Advertising API
Shoe Organizer
Nail a shoe organizer such as this Simple Houseware Shoe Holder to the back of the door. It gives you instant access to pockets for storing smaller items, such as flashlights, adhesives, scrapers and scissors, all in a transparent package.
All those small items you know you will need to use at some point, but can never find, can be stored here.
Last update on 2025-07-07 / Affiliate links / Images from Amazon Product Advertising API
Hanging Rails
A few hanging rails can be a great organization solution for tools like shovels, rakes, picks, axes, and the like. Depending on what exactly you’re hanging, a lightweight hanger like this Anybest hanger may be able to do the trick. If you’ve got heavy tools to store, you may want to pick up a studier hanger like this RoughRack, capable of holding 30 tools in a compact area!
Last update on 2025-07-07 / Affiliate links / Images from Amazon Product Advertising API
Shelving
Shelving is a great for storage boxes. The problem with too many shelves, is that they can end up cluttered. Some shed kits have optional shelves designed specifically for the shed, while others allow you to use off the shelf shelves (sorry, couldn’t resist!) to add storage.
Metal Wire Shelving
Depending on the size of your shed, and the contents, a set of metal wire shelves like these AmazonBasics shelves is always a good idea. Use it to store large storage boxes, each one will contain similar items.
One for electrical tools, and one for chemicals to stand up in, etc. Make sure the boxes are organized and keep them that way.
Try not to place anything in front of the shelves, otherwise, you will not be able to get to them. For this reason, put the shelves in a place where you are not going to block access.
Last update on 2025-07-07 / Affiliate links / Images from Amazon Product Advertising API
Adjustable Wall Shelving
You may prefer adjustable shelving, so you can change the distance between the shelves. We love the Flexmounts Shelving System. For this sort of system, you will need to attach two metal rail bars to the wall, vertically. This way the specialist shelves can move up and down the bars, as needed.
One bonus of metal shelving is that they are rot free, hard wearing and sturdy.
Use a High Shelf
Attach a single wooden or metal shelf as high up as you can on the wall. Put it all the way around the shed, or at least on one wall. Because of its height, you can still place storage ideas underneath it, such as the pegboards.
Pop things on this shelf that you don’t need access to very often. It’s a good place to store chemicals, or anything sharp, putting them out of reach.
Hanging Under the High Shelf

You can utilize the space under the high shelf in many ways.
- Try screwing the metal lids of Mason jars to the underside of the shelf. Then screw the jars into their lid. Fill them with small things, such as nails, screws, and washers. Because the jars are transparent you can see at a glance exactly what is inside.
- If you don’t have any glass/plastic jars, then use big or small plastic bottles, with lids. It is a similar concept but you don’t have to unscrew the container, as it too can be a permanent fixture until you need to fill it again.
- Or, you could simply place small hooks to the underneath of the shelf, for hanging things on.
Ceiling Storage:

It’s a great idea to make full use of the roof space as well. Have a look at these ideas:
Wire racks
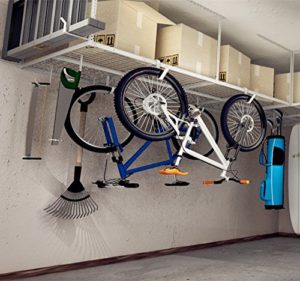
Attach these to the beams, in the roof, assuming you have enough space. You can see through the rack to find the stuff you have stored in the basket.
Then there are the large bulky items that will go nowhere in your house, so always end up in the shed, such as:
- A large set of ladders can hang on 2 bracket hooks, fitted on the wall, one to take either end of the ladder.
- A bicycle can hang in much the same way, each wheel, or just one wheel, hanging on the bracket hooks.
Conclusion
Whether you buy wood, metal or plastic, is a matter of personal preference. Each has their own good and bad points. Whichever you choose, if you have invested in it, then take those extra moments, at least once a year, to look after it. Then it can look after your stored items.
Happy organizing!


Leave a Reply